Thursday 14 September 2017

Automation Test works fine locally but fails when customer running it on his environment ?


As an automation engineer we have to demonstrate the framework, script written to customer or product management or senior folks from ladder.it observed things works fine when you are developing it but when customer try to run it ,he faces lot of issues to start with.to get rid of it You can use Amazon Machine Image

How to do that ?

  • ·         Instead of sharing the document with your customer about How to run you automation, you can keep one machine ready with all setup on cloud  by creating an AMI instance. (EC2 Instance : https://aws.amazon.com/ec2/getting-started/ )
  • ·         Install all required software which you needed to run your automation on that machine.
  • ·         Once automation setup is done, make sure all your test are running fine on that machine.
  • ·         Now create an amazon machine Image from that machine , An Amazon Machine Image (AMI) provides the information required to launch an instance, which is a virtual server in the cloud. You specify an AMI when you launch an instance, and you can launch as many instances from the AMI as you need. You can also launch instances from as many different AMIs as you need.
  • ·         That’s It, you are done now don’t worry whether customer will be able to setup your framework
  • ·         Share this image with you customer’s AMI account number and take a sleep J
  • ·         He will be able to see this image in his Amazon account, he has to instantiate a machine from image template and connect to that machine and have to run the automation script.

How customer can create a machine form the image template that you shared.
There are 2 ways to do it :
1.       AWS console
2.       AWS command line

    1. Open the EC2 console.
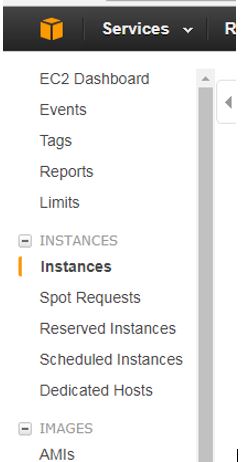
      Note: Before getting started, make sure to 
      select the AWS region you want to launch the instance in.
    2. From the left navigation bar, choose AMIs.
    1. Find the AMI you want to use to launch a new instance. To begin, open the menu next to the search bar and choose one of the following:

If the AMI you’re using is one you created, select Owned by me.
If the AMI you’re using is a public AMI, select Public images.
If the AMI you’re using is a private image that someone else shared with you, select Private images.
Note: The search bar automatically provides filtering options, as well as automatically matching AMI IDs.
    1. Select the AMI and choose Launch.


    1. The management console guides you through configuring your instance. When you’re ready to launch the instance, choose Review and Launch.
Choose instance type


    1. Review your chosen settings. When you’re ready, choose Launch.
Download. pem file, which you will need in future to access that box


g.    From aws console go to Instance , sselect the instance which you just created and click on instant state as start.


This is one of the way to simulate automation development environment at customer's end and both will be having same environment and have to focus on developing and running the test.

Same can be achieved using Docker as well, i will cover it in my next blog

Happy Automation testing


Tuesday 10 February 2015

Getting started with Robot framework with selenium webdriver


Getting started with robot framework

Intention of this blog is to help in installing the Robot framework with selenium webdriver step by step :

Step 1 : Install the python, you can download the installer from here  https://www.python.org/downloads/  ,use python2.7 ,robot framework is not yet compatible with  python3.4 (till feb -2015)

Step 2:  After installing the python ,make sure to set the path in environment variables
                In system variable add PYTHON_HOME and add that variable in path variable as % PYTHON_HOME%
        setx PATH "%PATH%;C:\Python27\Scripts"
to verify whether Python has been installed correctly or not
go to command prompt and type the command python –V ,it should display the version of installed python.
Step 3:   Now install robot framework
        pip install robotframework
Step 4 : install selenium2 library
        pip install robotframework-selenium2library


If you want to run the sample test with Robot
it will have 2 folders :
1. demoapp (it’s a simple AUT)
2. login_tests(it’s a set of test to validate your application)

To startup the demo application url :
Go to directory where you have downloaded demoapp for e.g “cd c:\WebDemo”
         python demoapp/server.py

Running tests

The test cases are located in login_tests directory. To execute them all use:
pybot login_tests

Report generation


Report will get generated in the same directory 

Tuesday 29 October 2013

Running selenium tests with TestNg (Unit testing tool)

While exploring different selenium forums , I have observed that ,Many test engineers asks the question “Is it mandatory to use any unit testing tool (Java : testNg,Junit or dotNet: Nunit Or python :PyUnit) with selenium for running the tests
If someone will ask this to me I will answer it as a ‘NO’ ,we can run our selenium tests in a suite without using TestNg/Junit/Nunit or any other unit testing tool.

How can we run selenium tests without using TestNg,Junit or any Unit testing tool.
Simply write a client class with main method as follow and give the call to methods that you want to execute in a suite.
public class SeleniumClient {
      public static void main(String[] args) {
            SeleniumTest testClient = new SeleniumTest();
            testClient.LoginToApplication("loginName", "loginPassword");
            boolean isSuccessfullyLoggedIn = testClient.VerifySuccessfulLogin();
      }
}

What is a drawback of doing this ?
Testwriter has to explicitly call his methods to get it executed in a suite which is a big overhead for him.

What is a best way to achieve this i.e executing selenium tests in a suite using any unit testing tool ?
First You can configure testNg plugin to eclipse IDE as per the documentation given on testNg SIte
For the Eclipse plug-in, we suggest using the update site:

  1. Select Help / Software updates / Find and Install.
  2. Search for new features to install.
  3. New remote site.
  4. For Eclipse 3.4 and above, enter http://beust.com/eclipse.
  5. Make sure the check box next to URL is checked and click Next.
  6. Eclipse will then guide you through the process.
Once you have configured testNg  with your eclipse there are two ways to run the tests in a suite :
You can either write testNg class as per the documentation given here 
Or You can write a testNg.xml as per your need to run the tests in a suite, mentioned here
How to use TestNg features while integrating it with selenium.

I observed many automation teams are integrating selenium with testNG.While doing this exercise of integrating Selenium with lot of questions comes in mind of automation engineer,here I am trying to answer few of the use cases that I come across while using selenium with testNg.

How to classify selenium tests in different groups using testng ?
Requirement 1 : If I have a requirement to categorize all my automated tests in 3 different groups
                “Smoke Test” ,”Critical Test” and “Regression Test” how can I Differentiate this tests in different group.

@Test(groups = { "Smoke Test" })
      void testMethod1() {
            >>>>>Method definition>>>>>>>>
      }

      @Test(groups = { "Critical Test" })
      void testMethod2(String... b) {
            >>>>>Method definition>>>>>>>>
      }

      @Test(groups = { "Regression Test" })
      void testMethod3(int a, int b) {
            >>>>>Method definition>>>>>>>>
      }
Now I have to execute only Smoke test, how to handle it with testNg.xml
                                <groups>
                  <run>
                        <include name="Smoke Test"/>
                  </run>
            </groups>
              
Requirement 2 :  I have 100 tests automated out of that I have to exclude the tests which is having a product bug.
@Test(groups = { "Product Test", "Smoke Test" })
      void testMethod1() {
            >>>>>Method definition>>>>>>>>
      }

      @Test(groups = { "Product Test", "Critical Test" })
      void testMethod2() {
            >>>>>Method definition>>>>>>>>
      }

      @Test(groups = { "Product Test", "Regression Test", "Bug" })
      void testMethod3() {
            >>>>>Method definition>>>>>>>>

      }
I don’t want to execute the tests which are already having a product bug, remaining all tests needs to be executed.
                                <groups>
                  <run>
                        <include name="Product Test"/>
                        <exclude name="Bug"/>
                  </run>
            </groups>
     

What is a SoftDependancy and HardDependancy in TestNg ?
                Most of the time we need to deal with 2 type of dependencies ,
1.       Hard Dependency:  If there are two methods and method2 needs to be executed only if method1 is passing then this is a Hard Dependency.

@Test(groups = { "Product Test" })
      void startUp() {
            System.out
                        .println("this method will be responsible for all the prerequisites ");
      }

      @Test(groups = { "Product Test" }, dependsOnMethods = { "startUp" })
      void hardDependantTest() {
            System.out.println("Perform actual test execution code.");

      }
                                Here hardDependantTest() will get executed only if startup() gets passed.

2.       Soft Dependency:  If we bother only with the sequence of the test, means method2 needs to be executed only after method1, irrespective of its execution status pass or fail ( mehtod2 needs to be executed even after method1 fails)
@Test(groups = { "Product Test" })
      void testMethod1() {
            System.out.println("Perform actual test execution code.");
      }

      @Test(groups = { "Product Test" }, dependsOnMethods = { "testMethod1" }, alwaysRun = true)
      void testMethod2() {
            System.out.println("Perform actual test execution code.");

      }
More complex part related to selenium and testNg will get covered in next blog !!

Thursday 8 August 2013

Simple solution to automate Selenium tests of Uploading/Downloading file from/To local Disk for Firefox.

I have observed that many automation engineer gets stuck while automating Upload/download File  from/to local disk ,related tests with selenium, I would like to take this opportunity to throw some light on it

Autoit is one of the option to download or upload the file but many automation framework developer avoids the use of third party tools with their framework, Even though it’s an open source, it could get licensed in future.
Apart from AutoIt, there is couple of other solutions to achieve it.here I tried to list it down along with the open issues for the provided solution.
Here is what we already tried and the problems we faced along with the actual solution :)

Solution 1 : Uploading a file using Autoit & WebDriver
Refer a blog : blog1 and blog2

Solution 2: Download programmatically using href attribute of button/link/image
Problem: Works only for button/link/image having href pointing to actual file location. IPP uses javascript as value for href. So cant be used.

 Solution 3: Use user32 (JNA)
            Fine for tasks like checking window existence, setting focus on specific window etc.
Problem: But can’t identify objects on window (buttons, checkboxes etc. on window).

 Solution 4: Use SendKeys on window under focus
            Problem:  Firefox popups doesn’t respond to keys send programmatically.

 Solution 5: Use Send keys using selenium
             Problem:  Selenium sends keys only on objects which Selenium identifies. Firefox’s ‘File Download’ popup is not recognised by Selenium.

 Solution 6: Use AutoHotKey tool
             Problem:  Firefox’s ‘File Download’ popup doesn’t respond to keys send by AutoHotKey.

Solution with which I moved ahead and found very simple.
Simple Solution: Use firefox profile to handle file download
Firefox settings to manage File Download dialog in Selenium:

1.       Disable “Show the Downloads window when downloading a file”:
2.       Add default download path to profile being used for Selenium run.

3.       Download each file type (which you will be downloading during test runs e.g. .xls, csv, txt etc.) once and check the “Do this automatically for files like this from now on” option.
Note:
1.       Above options (1,2 and 3) once set, will automatically download selected file types to folder specified in step 2.
2.       Above options are stored in the current firefox profile.
3.       All these options can be changed using Applications tab in Firefox’s options.

Even internet explorer and chrome are having those options so that we can download the file at one fix location so that  you will not have to work on download window.
Feel free to revert back.


Friday 2 August 2013

How to deal with multiple frames with dynamic Ids using webdriver.

Here I would like to address an issues that I faced while upgrading the existing automation framework of selenium webdriver  to support HTML5 UI.
Earlier Application Under Test (AUT) was developed in Icefaces means all tables, popups,controltypes were developed in icefaces. later on management decided to revamped the IceFaces UI with HTML 5.
To render the old UI of Icefaces on HTML5 , developers has deployed an additional Iframe for each view. And it has created a big challenge for me to keep existing tests running on the new UI without modifying the tests. I followed following approach in updating the framework/keywords to make sure test won’t need an update.

Main challenge :
In this assignment the main challenge was to attach an iframes with dynamic IDs .Switching between different iframes, once user has changed the Views.
In this I was not aware of the frame ID to whom I have to attaché webdirver , because each frame was having a dynamic ID starting with String ‘Frame’ for e.g Frame1256893
I could use this as an xpath :
String frameXpath = "//iframe[starts-with(@id,'Frame')]";


But it will not solve all my problems because there could be multiple views opened at a time with only one view in a focus.if I would have been used only above xpath then it would have always attach the webdriver control to first frame

How can we achiev it ?

protected void attachToVisibleViewFrame() {
  String frameXpath = "//iframe[starts-with(@id,'Frame')]";
  driver.switchTo().defaultContent();
  WebElement[] framesElement = wedriverInstance.findElements(
    By.xpath(frameXpath), 3);
  if (framesElement != null) {
   for (WebElement frameElement : framesElement) {
    if (frameElement.isDisplayed() && frameElement.isEnabled()) {
     System.out
       .println("PortalView : WebDriver control switched to a frame with label : "
         + frameElement.getAttribute("view-label"));
     driver.switchTo().frame(frameElement);

     break;
    }
   }
  }
 }
Above code additionally checks whether iframe for which webdriver is trying to get attach isDisplayed and isEnabled.so it will always attach to a frame which is in focus and not to a frame which is hidden.
Hope this will help you to avoid an overhead of multiple frames within your application.

Thursday 13 June 2013

Easy Integration of Sikuli with existing framework of selenium

Nowadays Selenium is widely used tool for automating web application. In real life, products are enterprise application, so application would be an integration of  Silverlight ,Java applets,Raphael java script, canvas objects,Javascripts,Jquery. We could not expect everything to get identified with selenium and can face challenges in automating the few of the above mentioned UI with selenium.

Sikuli is one of the easiest tool to learn and can be used to automate anything using image recognition technique.
Here I am trying to share my experience about automating an enterprise application with integration of selenium and SIkuli.

I  was involved in automating the BPM product (business process modeling ),I have developed a framework in selenium to test this product .our functional team has developed around 1000+ tests using this framework.
Few months back our product development team has introduced new functionality of browser based modeling in which model can be developed in browser itself. This functionality was developed using canvas objects and Raphael javascripts.Automating this functionality was very important for us. Unfortunately selenium was unable to identify it. I tried all the options from selenium webdriver but all the efforts were in vain. Then We tried with different tools like Watir, Watij , AUTOIT and white to identify (business process modeling )BPM canvas objects but unfortunately these tools are also failed to get it automated.
                                                                                                                                                                                                                                            
While evaluating few other tools for BPM automation, I come across Sikuli (http://www.sikuli.org/), it’s an intelligent tool for recognizing the Canvas UI. It’s an open source tool.
It automates the UI using image recognition, and this image recognition technique was finest fit for us to identify Canvas objects and other modeler components from browser based modeler written in Raphael Java scripts.

Sikuli permits us to write the modularize tests in Java. Using this feature of sikuli, I  have integrated it in our selenium framework written in JAva
Sikulli team has provided neat and precise documentation about tool from basic to advance level, which guided us wherever we stuck up at any point while scripting with this tool.

As I mentioned earlier our functional team was expert  in writing the test using my existing framework written for selenium java. And I don’t want to expose them to new automation tool for automating one functionality from our huge product.so the main challenge for me was
ü  To integrate the sikuli with existing framework of selenium
ü  Developing the new keywords for sikuli , in a same way that I followed for selenium keywords,so that for our selenium test writer approach would remain same for writing the tests.
ü  With a detailed feasibility study of sikuli we observed that sikuli has its limitation and sikuli nowhere sits near selenium, so I decided to keep Sikuli’s use restricted to only for the UI which couldn’t get automate with selenium and remaining stuff with selenium.

How to integrate sikuli with existing framework of selenium ?
Sikuli provides sikuli-script.jar.you can download it from sikuli site  as recommended on the download page, Import this jar is your java application, once you have this jar in your java application.
You can invoke sikuli api’s in your selenium framework by creating Screen objects instance.

protected static Screen sikuliObject = new Screen();

Following is one of the simple way to call selenium and sikuli api alternatively as per the need of the test.

in following code ,Line 2 to 6 is of selenium code and line 11 to 13 is of sikuli code.

public void dragModelElementInCanvas(String modelElement, int x,int y) {
String elementToclick = "//a[contains(.,'"+ modelElement + "')]";
WebElement clickabelModelElement = seleniumDriver.findElement(By.xpath(elementToclick));
if (clickabelModelElement != null) {
 Actions action = new Actions(driver);
 action.clickAndHold(clickabelModelElement).perform();
 sleep();
//If you have been observed that selenium is not able to identify the component (e.g canvas)where you would like to above dragged element.
   System.out.println("moving mouse to the location " + x + " : " + y);
   sikuliObject.mouseMove(new Pattern(getAbsolutePath()).targetOffset(x, y));
   System.out.println("simulating mouse up");
 sikuliObject.mouseUp(Button.LEFT);
 action.release().perform();
  } else
   throw new KeywordException(
     "Timeout recieved while finding element with Xpath:"
       + clickabelModelElement);
 }
Important part here is for testwriter whomsever is using your framework will not have to bother which underline tool you are using to automate the stuff. For e.g in above code selenium testwriter will call the method dragModelElementInCanvas ,where he/she will not realize which tool has been used to achieve the task.

Above is the just the reference code that I have documented here for the one who will be getting started withselenium and sikuli’s integration. In real life we have developed many classes where we are using selenium and sikuli Hand to hand. Post your doubts if you are facing any specific issues while integrating selenium and sikuli.i would like to share my experience as we already overcome many challenges that we faced in integration of two automation tools in our existing framework of selenium.

Happy integration !!